Showing posts with label Art Project. Show all posts

Monday, November 9, 2015

Scaredy Squirrel Art Projects

On Tuesday, Scaredy Squirrel had the kids make acorns since he was unable to find any outside right now.  It was an easy tracing and painting project. The acorn top was traced onto light brown paper (with a tracer I made) and the bottom of the acorn was traced onto darker brown paper (with another tracer I made).  The two were then glued together.  The final step was using a small bit of sponge and brown paint to sponge paint the acorn top.   


Scaredy then punched holes in the acorns and strung them up over our classroom library and the kids loved it!

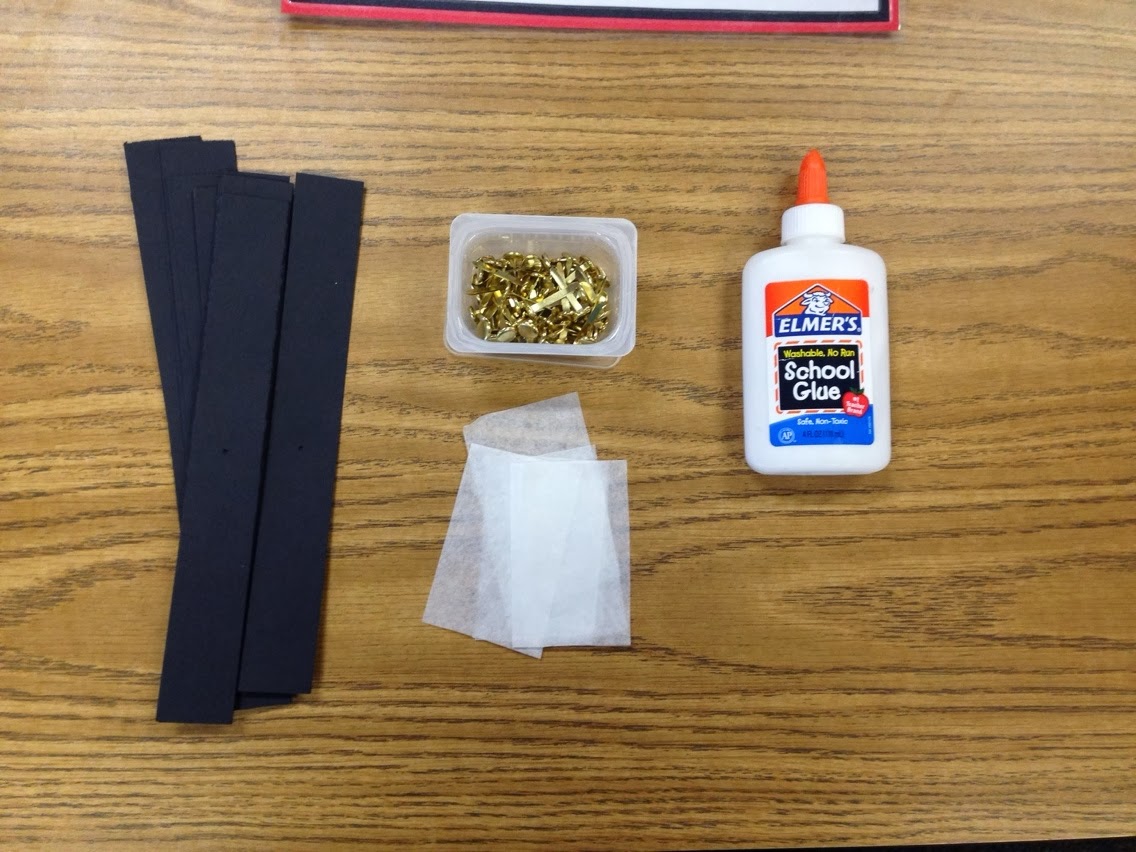
Then on Thursday, during small reading groups, I had the kids make Scaredy decoupage style.  I looked on Pinterest for something to use or copy but ended up creating my own.
Each student got a tray with the above parts and then assembled Scaredy after watching me do mine.
We added name tags the next morning (printed from the internet).

The next step with this project is for kids to write up a narrative of who Scaredy is and display them in the hallway.  You can get that project for free by clicking HERE.


Monday, February 17, 2014

Valentine's Day. . . . .yes a bit late!

What do you get when you have parent-teacher conferences + a full moon + Valentine's day + an inservice + a class?   A VERY busy week and no time to blog :-( 

someecards.com - Parent-Teacher conferences, a full moon, Valentine's Day AND an inservice? Oh, THAT'S why my week was CrAzY!

We did have some Valentine's art fun that I wanted to share.  During our reading groups, my students made some cute hearts that I saw on Pinterest.
The process of rolling up paper is called "quilling" and I think the end product looks like flowers.  
First students traced a heart onto tagboard and then cut it out.
After rolling several quills, students glue them onto the heart.
Students used paintbrushes to put lots of glue onto the heart.
One of my students faced her quills the other way.
This project could be adapted for other holidays or projects: Mother's Day, St. Patrick's Day, Spring, etc.

And I asked my students to create their own Valentine container.  Here were a few of the cute ones:
a LEGO container
Chewbocka
a dragon
a shark

Have a good week after Valentine's Day!


Sunday, February 2, 2014

A cute snowman craft and a FREEBIE!

February is here, can you believe it?
Snowmen was our theme for January and we ended the month with a really cute craft I saw on Pinterest.  All you need is an old CD, white paint, googly eyes, orange paper and black paper.  
This is my awesome fold out art table!
We do our crafts during our Daily 5 groups on T, W and Th this year.  So on Tuesday, students painted their CD white.  I just happened to find a bunch of old CDs in our art closet!  Then we finished up the snowman on Wednesday.

The nose is just a piece of crumpled orange paper, stuck through the hole in the middle. 
Aren't they super cute!  I love how each one has its own expression :-)

Now for the FREEBIE!
I read the Jan Brett story 'The Hat' the other day to my students and they asked about doing it as Readers' Theater but I told them I didn't have that script. But, lo and behold, I did have it on my computer and forgot I had written it a while back!  So go grab it, it's FREE!

Happy February everyone!


Sunday, January 26, 2014

Snowflake Art Project

We're not seeing too many snowflakes lately up here in Anchorage.  I know that sounds strange but I think we have traded weather with the lower 48.  It's been raining and melting like crazy here!  I can see the grass in our yard again, wahoo!  Give me sand (versus snow) any day.

I've been pinning art projects that could work during my Daily 5 groups all year and am really enjoying finally incorporating art into my classroom.  January has been all about snow so we did this super CUTE project this past week.  It was easy to prep, easy for kids to do and it turned out way better than I had anticipated!
Here's what you need.
Poke a hole in the middle of each "branch" and they can be fastened together with a brad.
Students crumple up big squares (3"x3") and glue them on.

The next day I punched a hole in the end of one of the "branches" and we hung them up with yarn above our classroom windows (forgot to take a picture of them).

SO FUN!  Click here to see the original source.  Thanks again Pinterest!
I'm on Pinterest as well, check me out:


Friday, December 27, 2013

Ice Luminaries

I've been on Winter Break for a week now and wish it would last more like a month!  When you think about it, it's a loooooooong haul starting in mid-August and going until the end of November for our first bit of time off (4 days) and then finishing up the quarter to have 2 whole weeks off at Christmas time.  And if you're like any teacher, you're catching up on things you haven't had time to do and spending time with your family.

I love to do fun things with my 5-year-old and so the other day we made ice luminaries.  I saw something about it in the paper one weekend and thought it would be fun to try.  My class recently started a new science kit: The Power of Water and we'll soon be doing the "3 States of Matter" lesson and this fun activity fit right in, so I may have to do it with my students too.

Here's the final product
There are 5 of them lining the sidewalk up to our front door.

I didn't follow any particular directions and just went on what I thought would work.  But of course I had to tweak it and we added food coloring.  I learned the hard way though how to do it without having hands that end up like this

1. First add food coloring drops to the empty balloon.
2. Then attach it to the faucet and fill it up as big as you'd like.
3. Next tie off the balloon and place it in the freezer or outside.
4. Finally drill holes in the top (round) of the sphere until a tea light candle fits 
    down into the hole.


Before I drilled holes in them, we sat staring at them up close because they were so cool!  Each ice globe had, what looked like, a frozen porcupine inside it.

 And, interestingly, the food coloring (blue) didn't show up at all.  So we made 2 more the next night with red food coloring and made sure to add more drops.  It worked as about 50% of the globe was red.

You've got to try this, either at home or school because it's so cool...no pun intended :-)


Sunday, November 24, 2013

Turkey FREEBIE

This week is short and sweet and I'm ditching curriculum in lieu of Thanksgiving fun (math, reading and writing of course)!

This freebie will be 1 of 5 art rotations that my students will do on Tuesday morning.  I'm having a great time finding and creating art projects for my kids to do as I hardly ever do art in my room but am embracing the importance and fun of it!

Click to get it!
I'm linking up with the fabulous Charity Preston over at
So go check this one out and then head over and take a peek at some more freebies!


Monday, November 11, 2013

Fishy Art Project

One of my goals this year is to incorporate more art projects into my classroom.  I'm doing a pretty good job and have found that making one of my Daily 5 groups an 'Art Project' group (once a week) works very well.  

Most of the projects have been fall themed so far but this week we made fish.  Living in Alaska, salmon are very important to the way of life here.  Second grade gets to dive into the study of these interesting (and dare I say 'tasty') creatures.  We have a big aquarium near the front of our school and right now it's covered in blue foam because we're trying to keep the eggs from getting too warm.  It's not very visually appealing so my principal asked if we could spruce it up a bit.  My answer was to create wax and watercolor fish!

I first found a piece of fish clipart online and printed it off.  I then added the inside wavy lines.  I printed them on blue cardstock.  The kids had 2 things to do:  trace the outline and inside waves with a black crayon -and- use watercolors to paint it.  I think they turned out AWESOME!

I cut them out and am going to glue them onto blue butcher paper and wrap it around the aquarium.

The best part about doing these art projects is the AMAZING table we're using!  I found it for $20 at a local thrift shop and it folds out and is stored into a rectangular box that is only 6" high and 3' long!  It's one of THE best things I've ever bought for my classroom!  I did spray paint it red to match the white/black/red theme in my room though :-)


I don't have a project planned for this week so I need some HELP.  I know I'll go surf on Pinterest but would happily welcome some of your ideas!


P.S.  Totally random but I saw Huey Lewis and the News in concert this weekend and it was SOOOOOOOO awesome and brought back many memories of family car trips!


Wednesday, October 9, 2013

Leaf Man

I love fall!  
The smell in the air, the change in temperature and the beautiful leaves.  Lois Ehlert also loves leaves and she collects them.  She has written a beautiful book, illustrated with her collected leaves.
We loved the book so much that my students wanted to make their own leaf artwork, like Lois Ehlert.  One of my goals this year is to do more art in the classroom and this project was great!


If the leaves are still on the trees where you are, get out there and collect some and try this fun project!